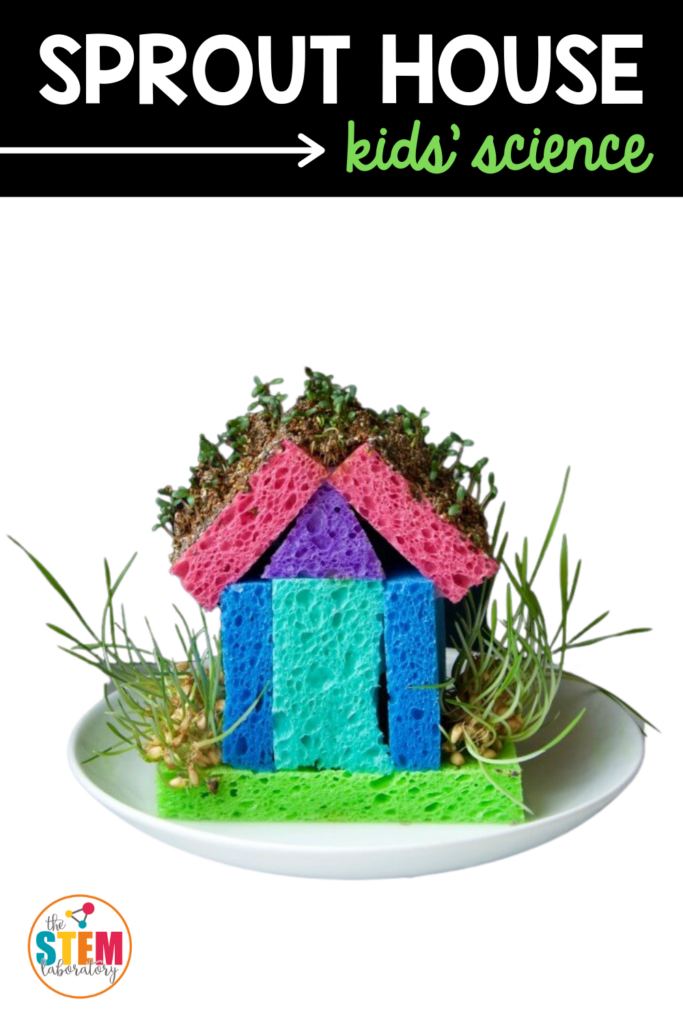
Sprout House Science Experiment – Watch Seeds Grow!
Have you ever wanted to grow a tiny garden right in your classroom? With this Sprout House experiment, kids get to build their own little greenhouse, plant seeds, and watch them sprout before their eyes! This hands-on STEM activity is the perfect way to teach kids about plants, germination, and engineering—all in one fun project.
What is a Sprout House?
A Sprout House is like a mini greenhouse, but instead of glass and metal, it’s made out of sponges! That’s right—plain old sponges! The sponges hold water, helping the seeds sprout and grow. Kids will design, build, and care for their very own tiny plant house while learning what seeds need to grow.
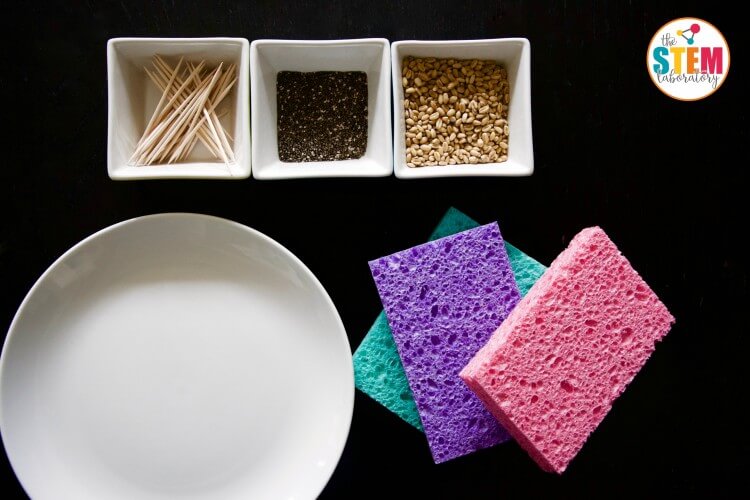
What You’ll Need
Gather a few simple supplies:
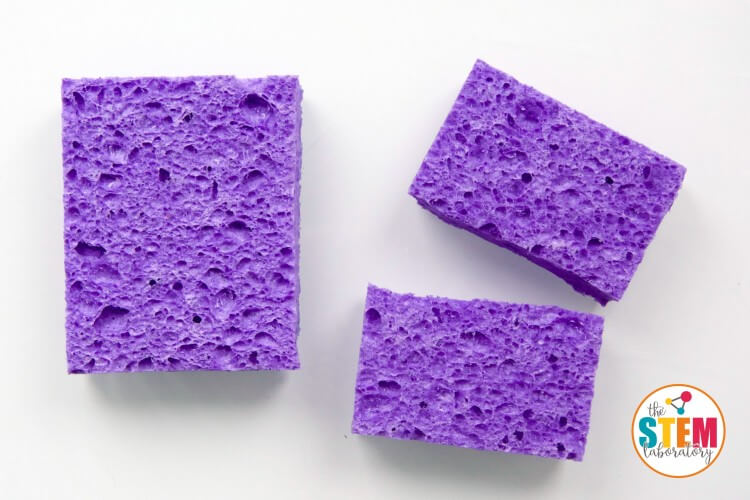
- 4 plain kitchen sponges – These will become the walls and roof of the house.
- Scissors – For cutting the sponges.
- Toothpicks – To hold everything together.
- Glue (optional) – If you want extra support.
- A shallow tray or plate – To hold the Sprout House.
- Fast-growing seeds – Try wheat berries, chia seeds, or alfalfa.
- A spray bottle – To keep the seeds moist.
How to Build Your Sprout House
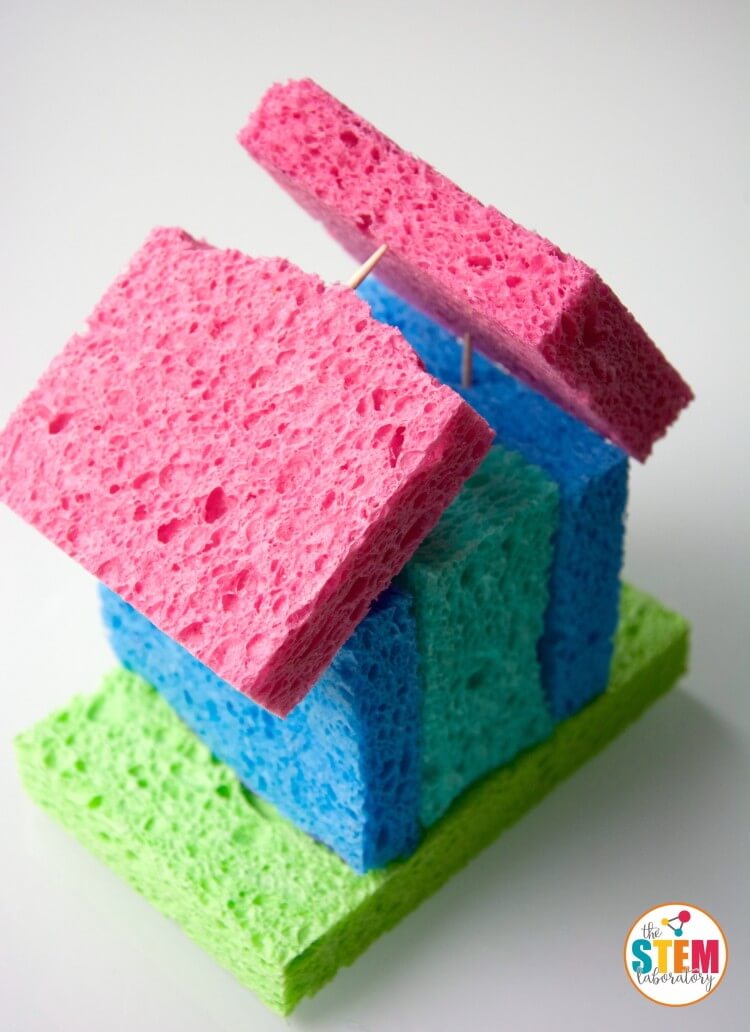
Step 1: Build the Walls
- Take one sponge and use it as the base of the house.
- Cut another sponge in half to make two side walls.
- Cut a third sponge in half—then cut one half again to make the front and back walls.
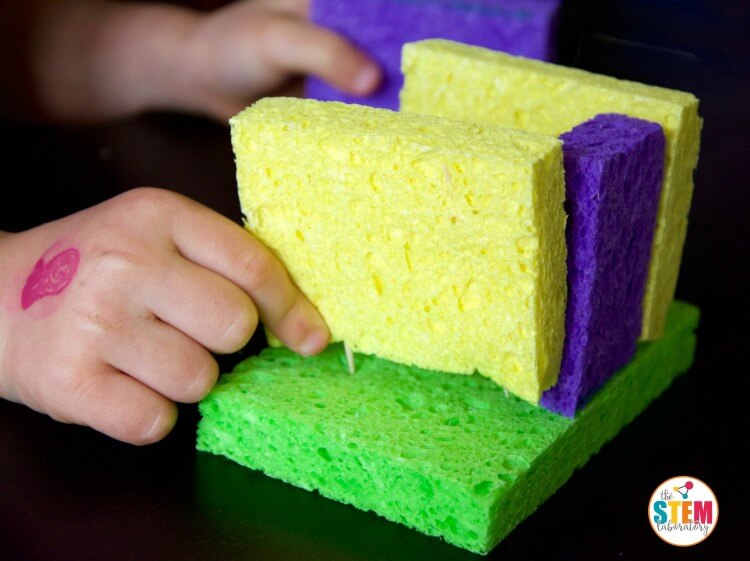
Step 2: Put It Together
- Attach the walls to the base using toothpicks.
- Press the toothpicks in deep so the walls stand up tall!
- Cut the last sponge in half to make roof panels and attach them on top.
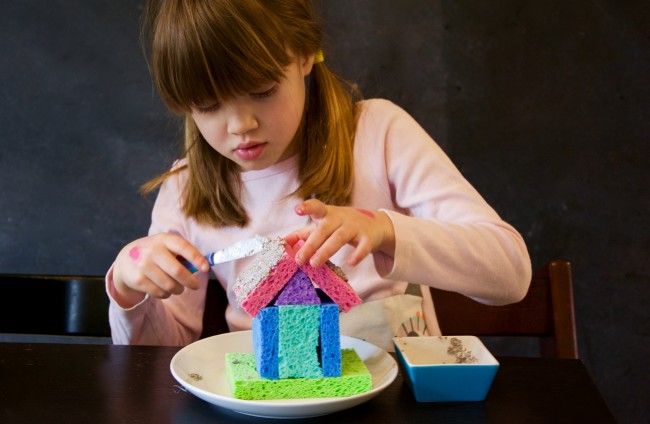
Step 3: Add the Seeds
- Spray the sponges with water until they’re damp but not dripping.
- Sprinkle a thin layer of seeds on the roof and walls.
- Gently press the seeds so they stick to the sponge.
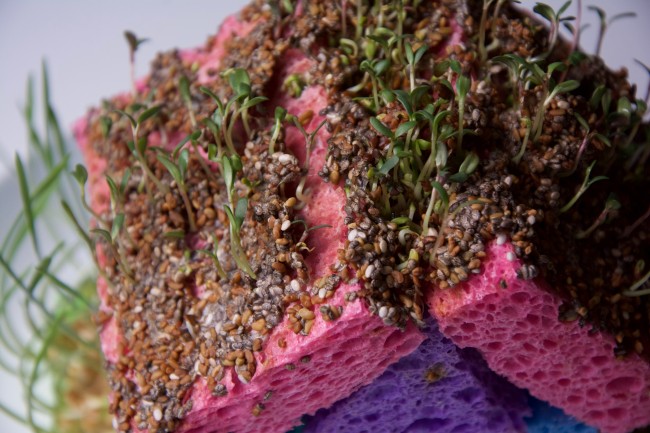
Chia and alfalfa seeds are a fun combo. Simply put about a tablespoon of seeds in a small dish and add a little water to create a seed slurry. Chia seeds absorb a lot of water and become gummy, which actually makes spreading the seeds much easier.
Step 4: Take Care of Your Sprout House
- Place the house on a tray or plate to catch any extra water.
- Keep it in a bright spot (but not direct sunlight).
- Mist it several times a day with the spray bottle to keep the sponges moist.
- Watch closely—in just a few days, the seeds will start to sprout!
What’s the Science Behind It?
This experiment teaches two cool science concepts:
-
Plants need water, air, and light to grow.
- The damp sponges act like soil, keeping the seeds wet so they can sprout.
- The bright spot provides light to help the plants grow strong.
-
Seeds go through germination.
- When seeds absorb water, they wake up and start growing!
- Tiny roots appear first, then little green shoots pop up.
Get the Record Sheet
Awesome news! You don’t have to scramble for instructions or create your own worksheets—it’s all done for you.
Grab the Sprout House record sheet, step-by-step directions, and 29 more easy-prep science experiments inside our 30 Science Experiments Pack—the ultimate time-saving bundle for busy teachers who want engaging, classroom-tested lessons that kids LOVE.
👉 Get your pack now and make science hands-on, exciting, and easy!
Click here to grab your Science Experiment Pack today!
Make science hands-on, engaging, and stress-free. Your students will love it—and so will you.


24 Comments