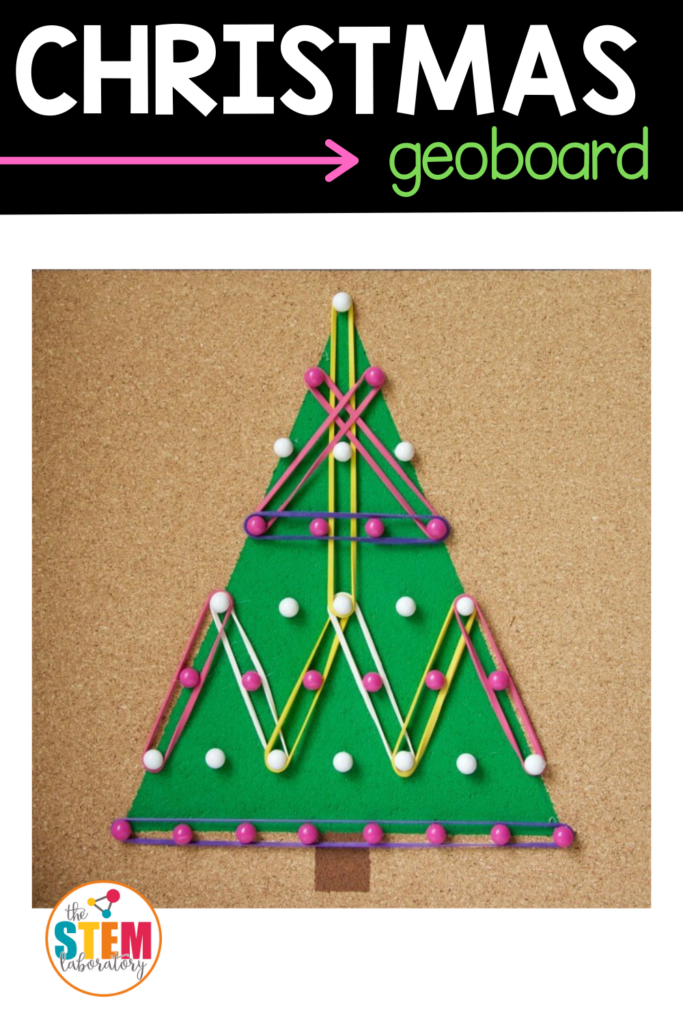
Christmas Tree Geoboard
This Christmas tree geoboard is a fun way to help little mathematicians explore shapes and geometry while strengthening those little fingers. Often seen in preschool classrooms, geoboards are an amazing math manipulative that helps explore not only shapes, but area, perimeter and angles and can be used all through the elementary years as a hands-on way to learn about geometry.
For more STEM your kids will love, check out our Epic STEM Challenge Bundle in our shop!
Getting Ready
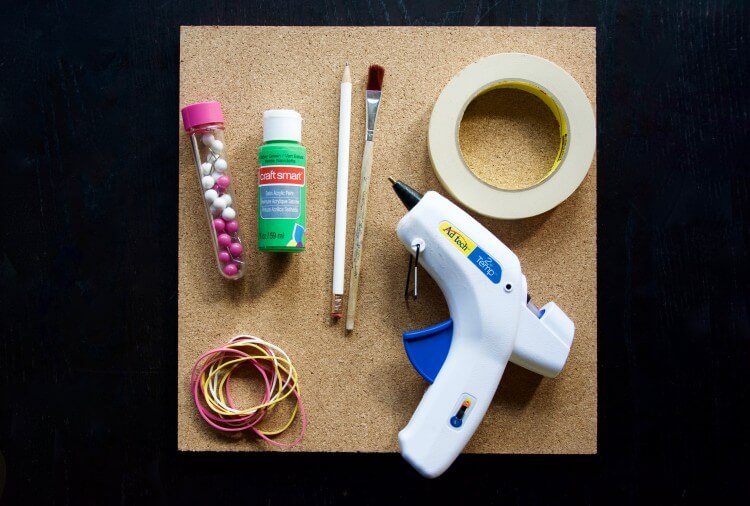
To make the geoboard, you’ll need some supplies:
- 12 x 12 cork board tile (We used 2.)
- Masking or painter’s tape
- Ruler
- Pencil or marker
- Green and brown acrylic paint
- Push pins
- Hot glue gun
- Rubber bands
Making the Christmas Tree Geoboard
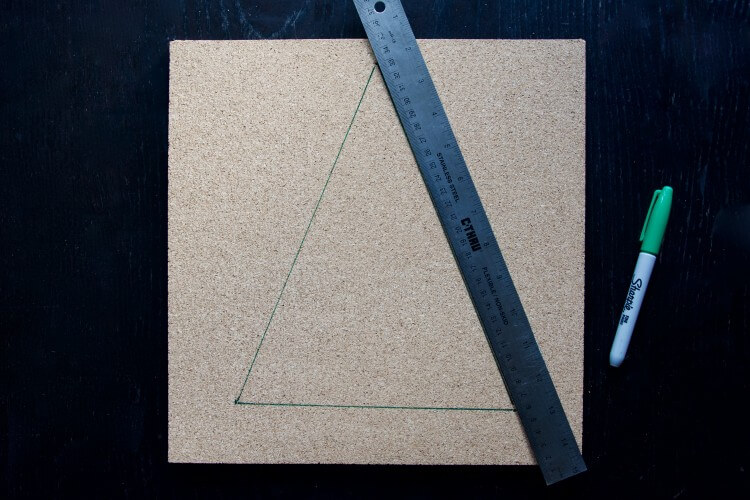
I started by measuring and drawing out the Christmas tree.
From the top, I measured 6 inches in (halfway) and 1 inch down and marked the top of the tree.
For the bottom corners of the tree, I measured 1 inch up from the bottom and 2 inches in from each side and made a mark. Using a ruler, I drew the 2 sides and bottom of the tree.
Once I had the outline drawn, I used masking tape to tape off the outside edge of the tree. This made it super easy to paint a straight line.
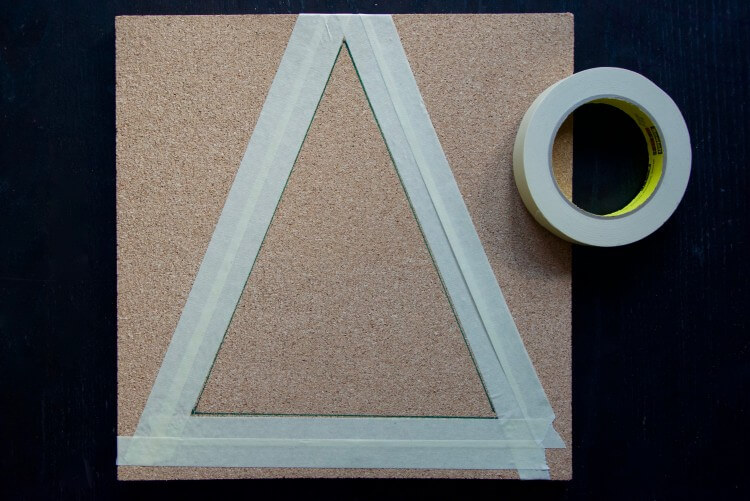
I was now ready to paint my Christmas geoboard! I grabbed a bottle of piney green acrylic paint and a paintbrush and painted around the border using an up and down dabbing motion.
Painting the edges with a stamping motion helps make sure the paint doesn’t bleed under the tape.
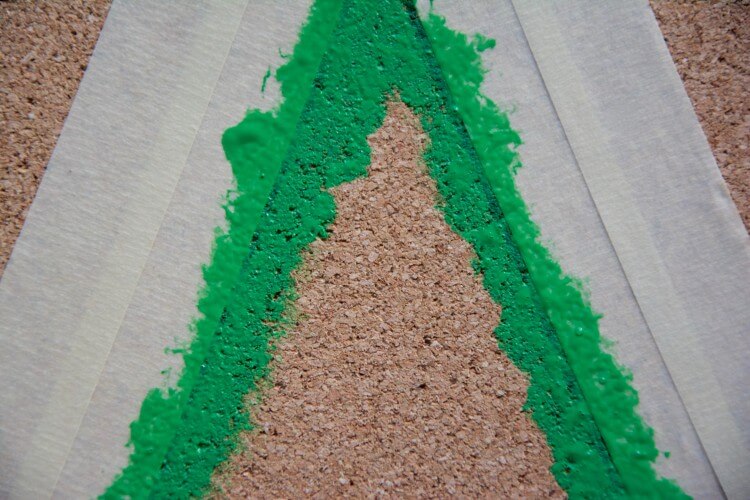
Once the paint dried, I filled in the rest of the tree and left it for a few hours to dry completely.
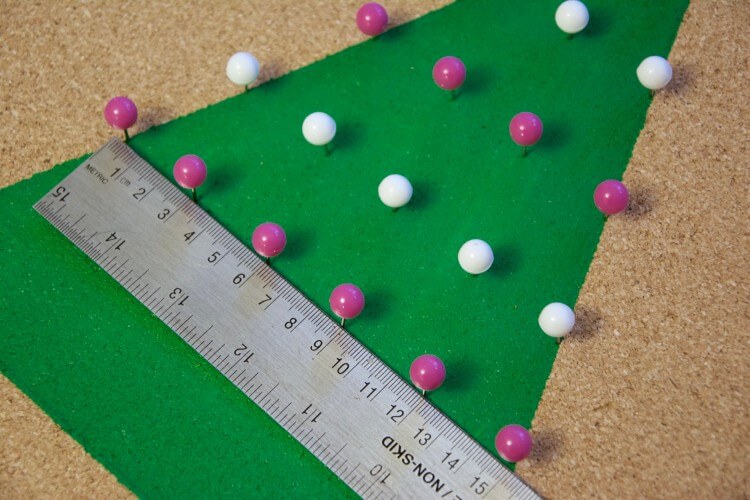
Then, I grabbed the push pins and a ruler. I started at the top of the geoboard and placed a pin very gently in every 1.5 inches down each side until I reached the bottom.
Once the sides were set, I filled in the insides and placed a pin every 3 cm. I had the placement all set, so I grabbed my hot glue gun and placed a small dab on each pin before inserting the pin in completely to add a bit of extra security to the geoboard.
The cork board was pretty thin, so the push pins stuck out the back. I flipped the board over, added a blob of hot, hot glue on the pointy ends of the push pins and glued a second layer of cork on the back.
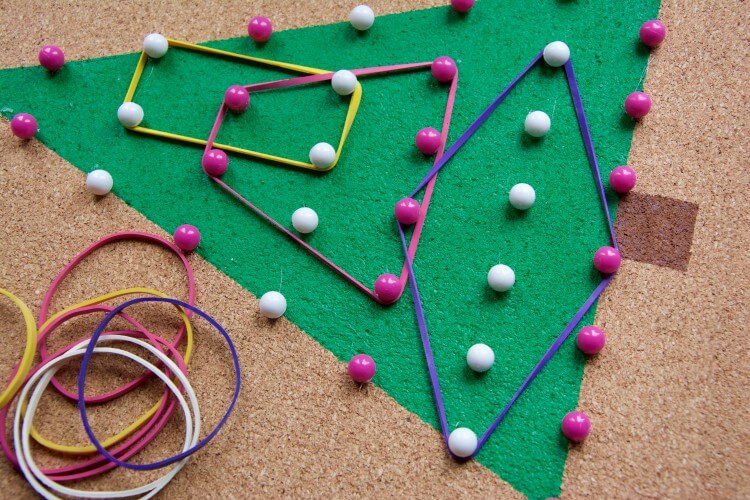
After a few minutes, the hot glue dried and we were ready to play our Christmas tree geoboard!
Differentiating with the Christmas Tree Geoboard
My 4 year-old loved making star patterns and liked to see how far he could stretch the rubber bands. Stretching rubber bands was a great way to strengthen those little finger muscles that he’ll need for writing.
After my 7 year-old played with it for a bit, I challenged her by asking her to make various shapes and then count the vertices and find the parallel lines.
She then turned her attention to showing her little brother how to make letters. So many possibilities with this Christmas tree geoboard!
More Fun STEM
Continue the fun STEM learning with our Epic STEM Challenge Bundle in our shop!