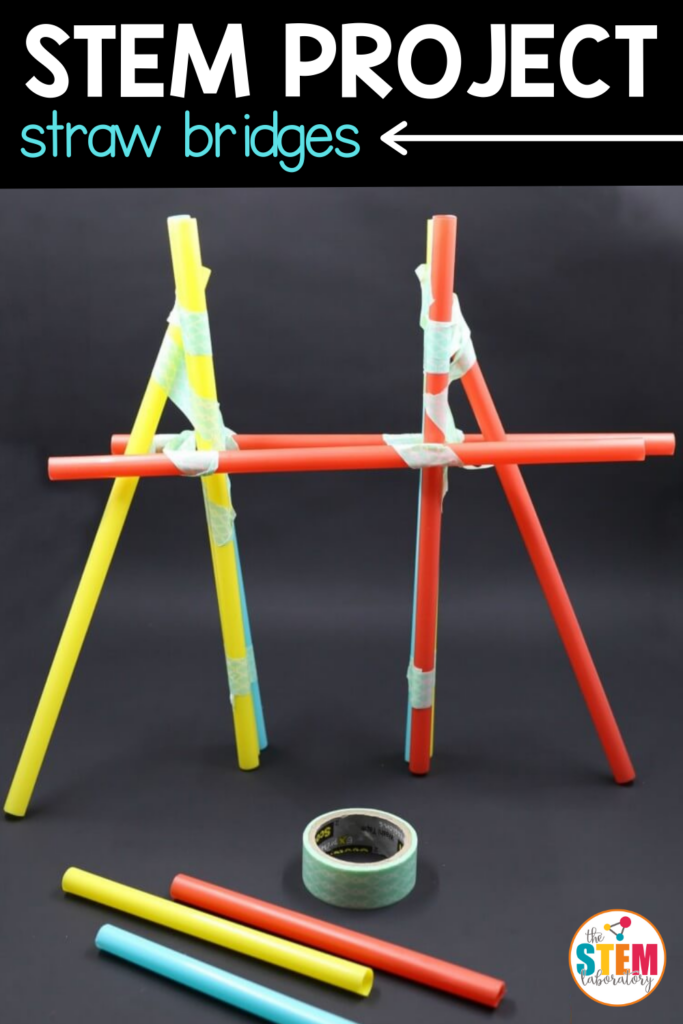
Straw Bridges
Building straw bridges is a fun way to strengthen kids’ science, technology, engineering and math (STEM) skills. With just a few simple supplies, they can design a load bearing bridge just like the ones they drive across in cars!
What will your class come up with!? Create more amazing STEM projects with our Epic STEM bundle!
This post contains an Amazon affiliate link.
Learning About Bridges
Before diving into our engineering project, I wanted to introduce the kids to some bridge basics so I pulled out a copy of Bridges! Amazing Structures and shared the major highlights. (The book is written for grades 2 to 6, so I needed to be selective to keep it age-appropriate.)

As we read, we kept track of what we learned by adding to a simple anchor chart showing the five bridges we were focusing on:
- arch
- beam
- suspension
- cable-stay
- truss
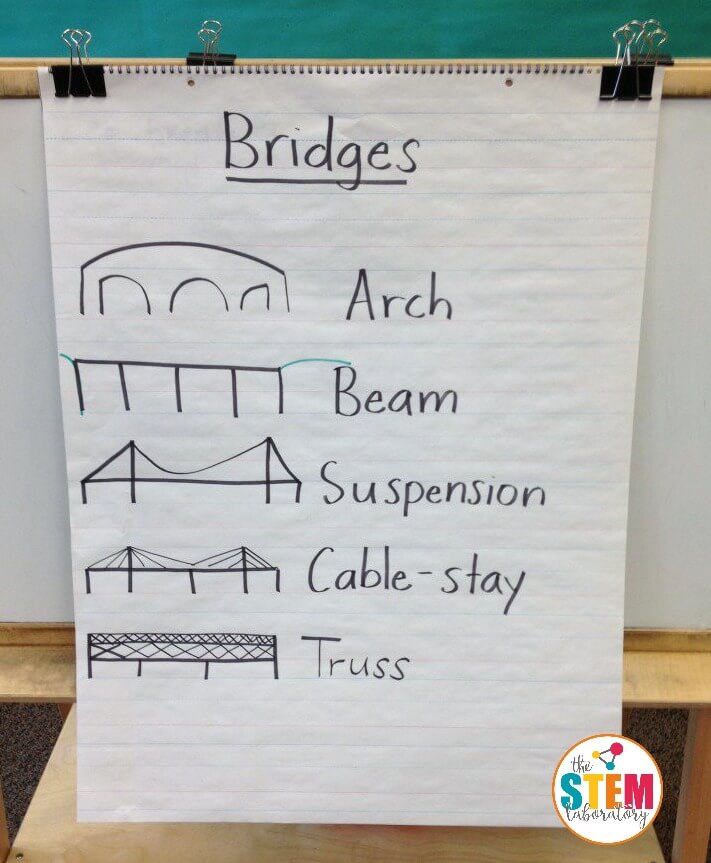
We chatted about how each design evenly distributes loads through specific points using a combination of pulling forces (tension) and pushing forces (compression).
For instance, in a cable stay bridge, cables direct the weight of the traffic and the bridge itself onto the support beams in the middle (called piers) and the supports on either end (called the abutments).
Building Straw Bridges
Once the kids had a solid understanding of how bridges work, they were eager to jump in and start building their own miniature versions with straws, scissors and tape.
The challenge was to build a bridge that would hold a cup of 100 pennies without falling over. This first draft held the cup when it was empty but toppled over when it was filled with pennies.
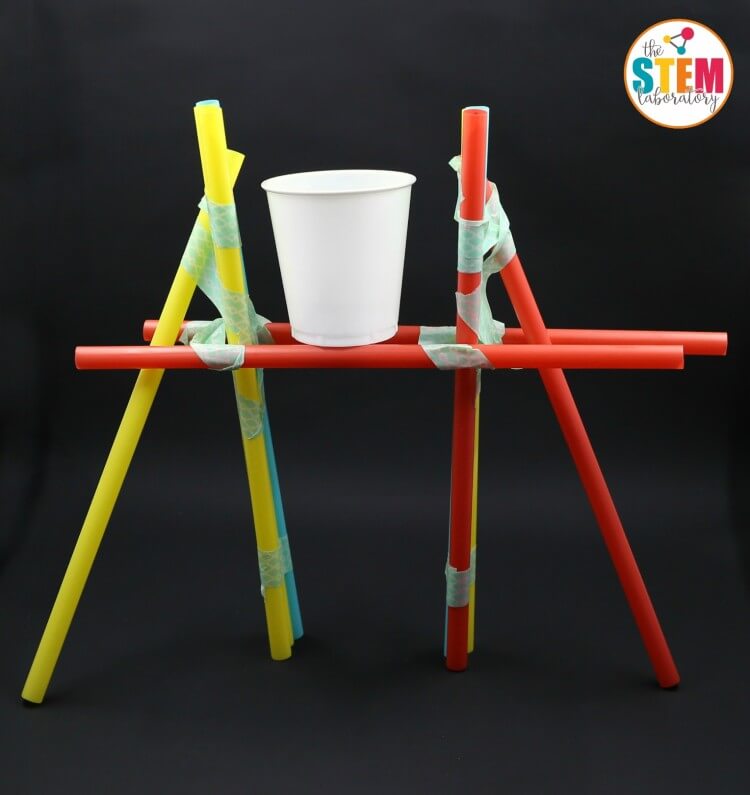
So the kids went back to work! They added more straw supports to distribute the weight and evened out the base to make the structure more steady.
Straws and tape might not be very strong on their own, but it was amazing to see how sturdy they could be when they were combined together just so!
Want More?
Ready for more STEM inspiration?! Check out our Epic STEM Bundle in our shop!


2 Comments